It’s rare to get someone who actually goes through the comment process on my blog but since they took the time to not only read my post but also to provide feedback I try to oblige. In this case Matt would like some of the finer details to my Shut down button I did on my media Raspberry Pi so here we go!
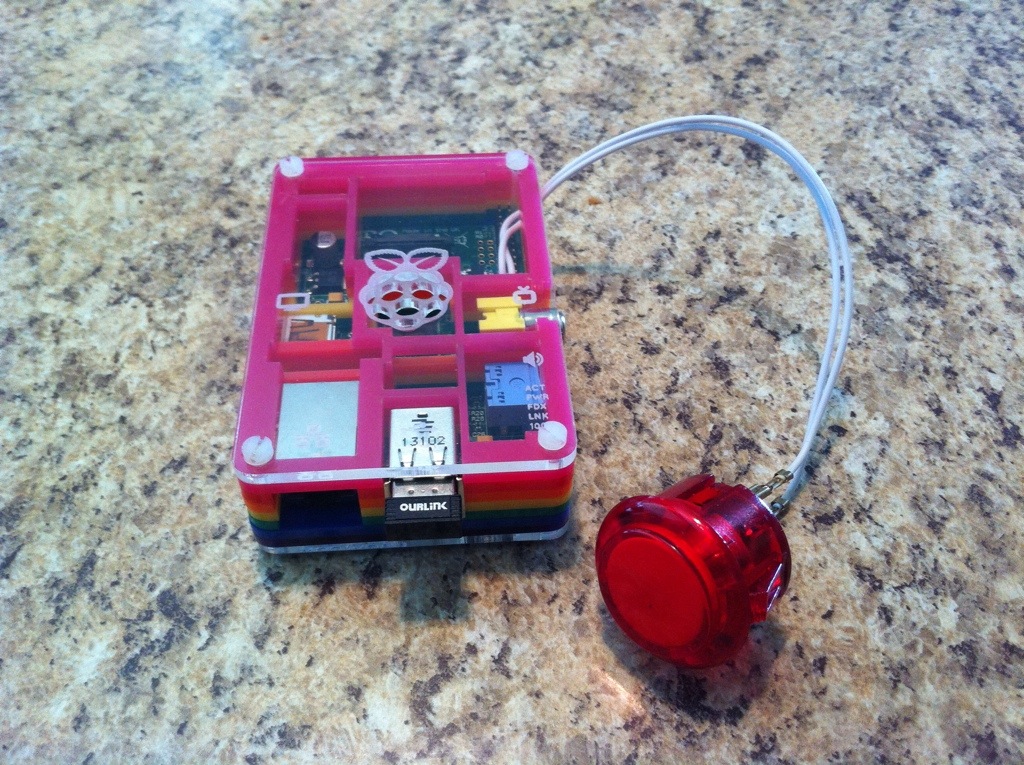
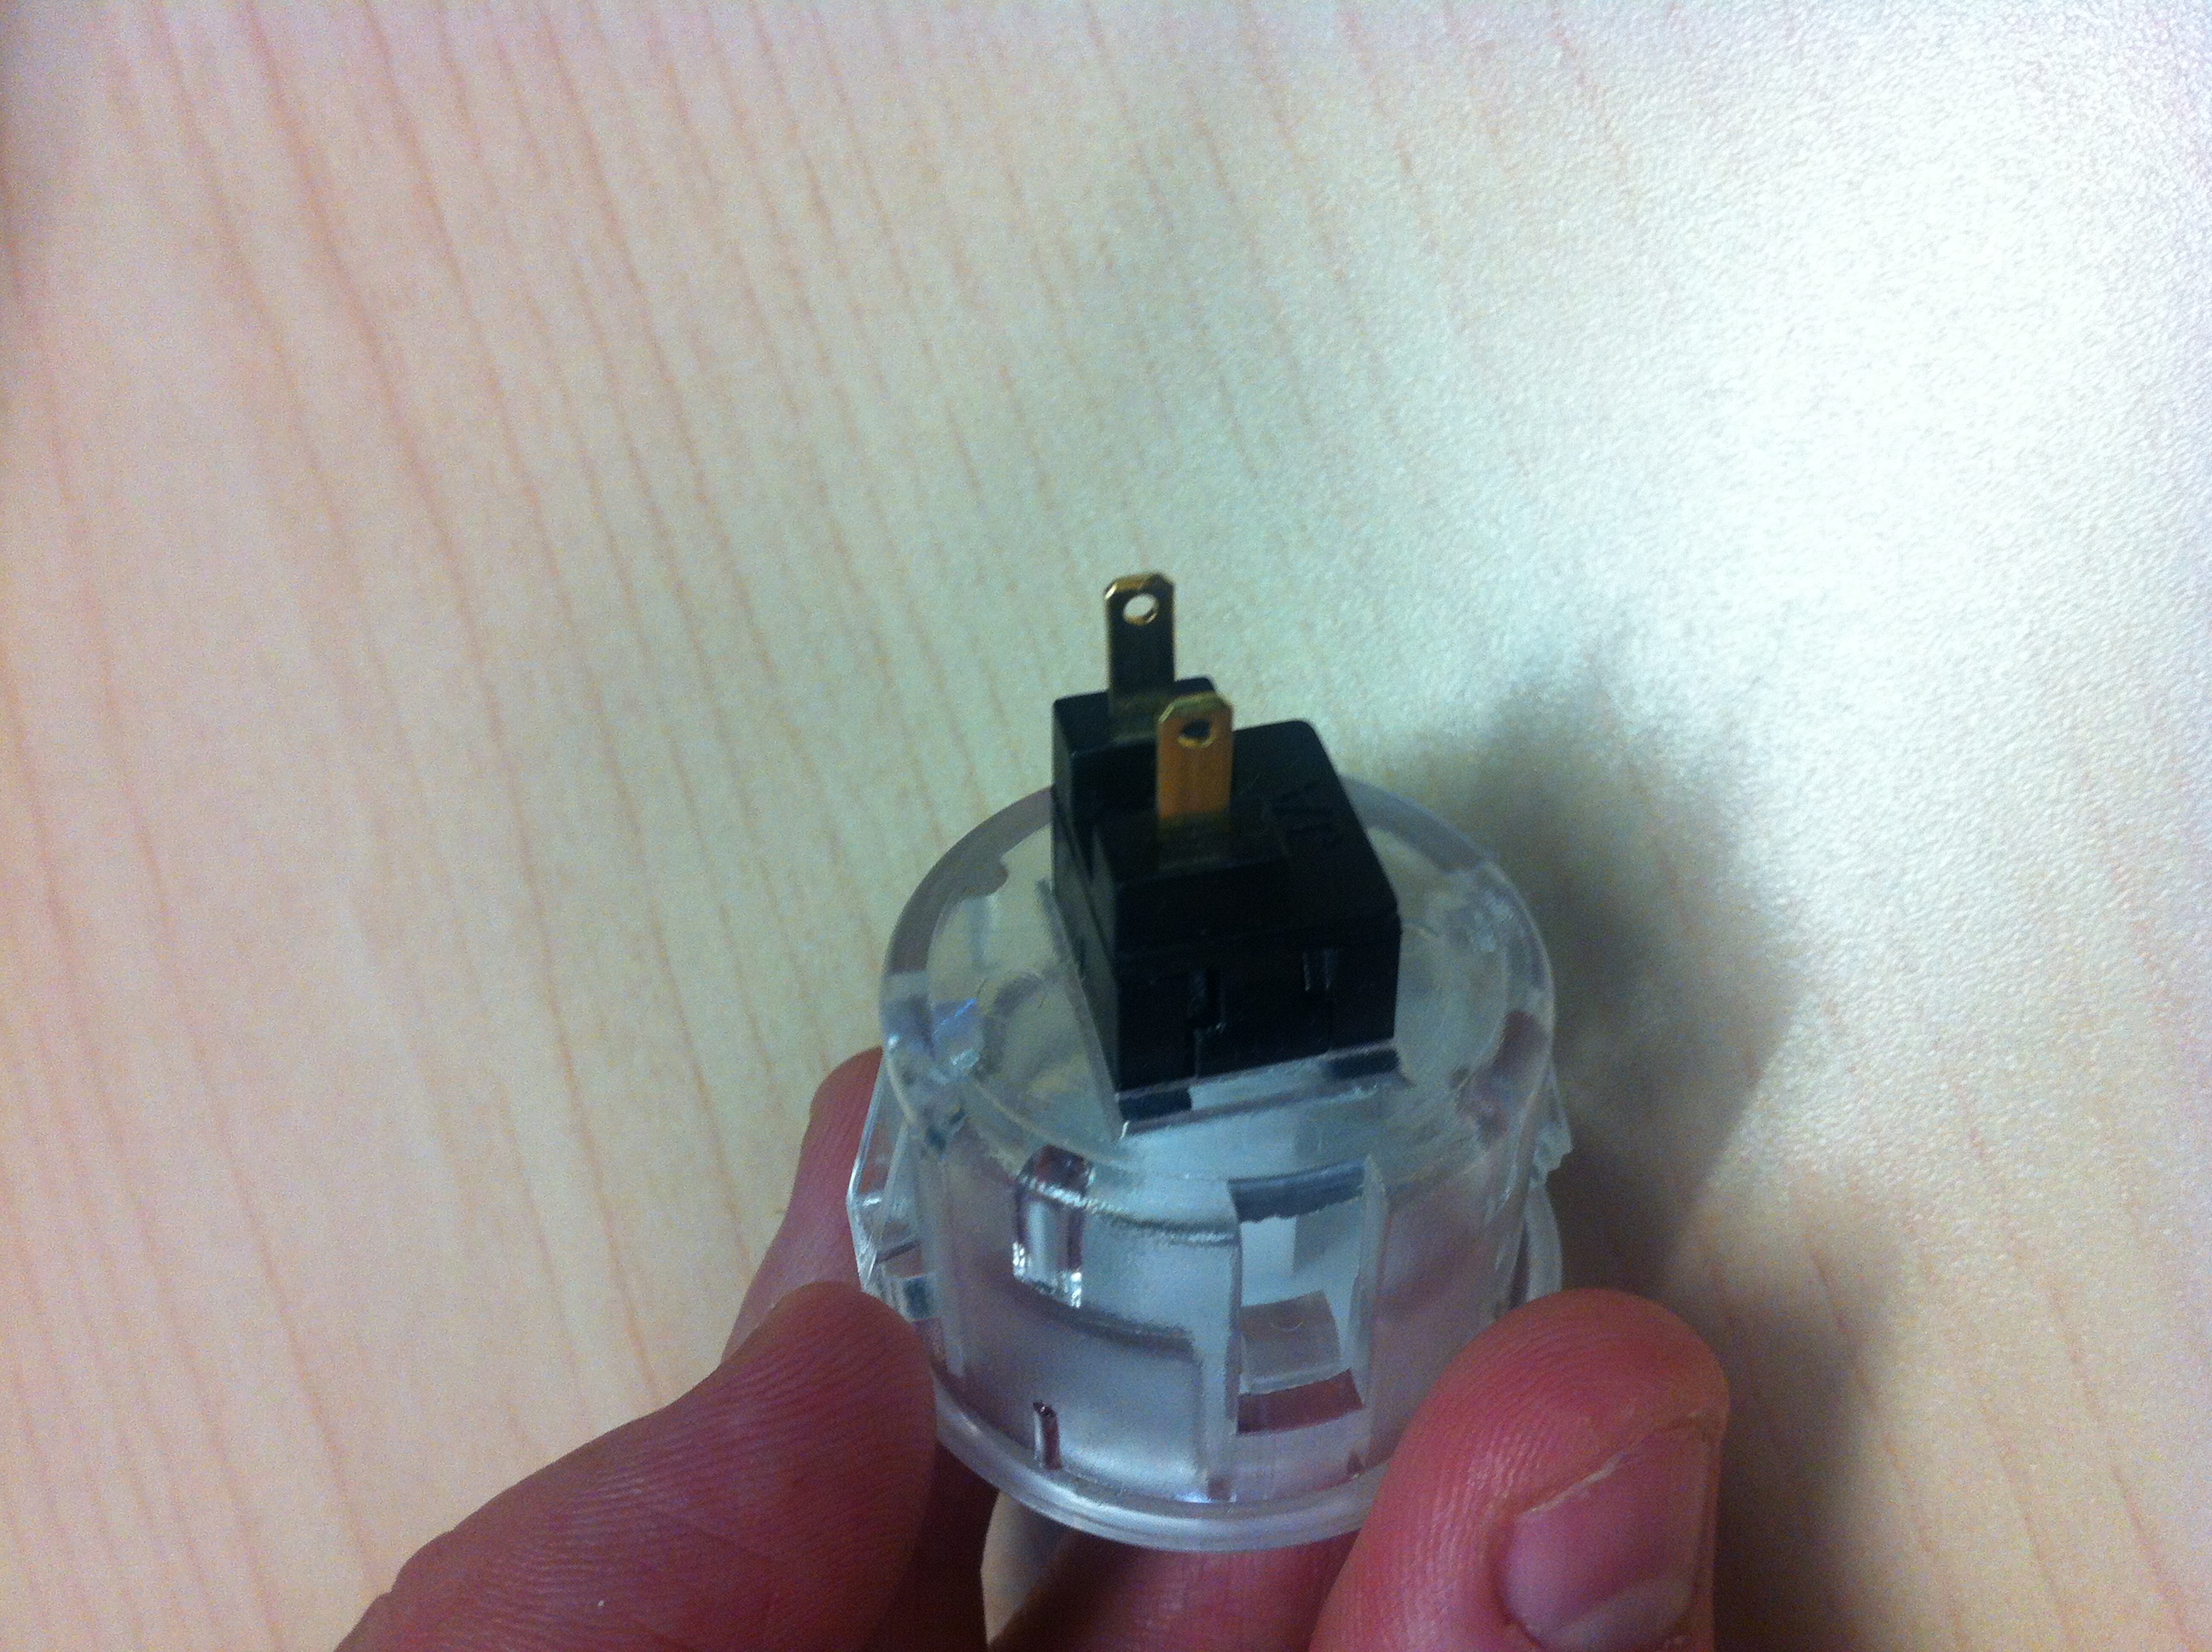
The button
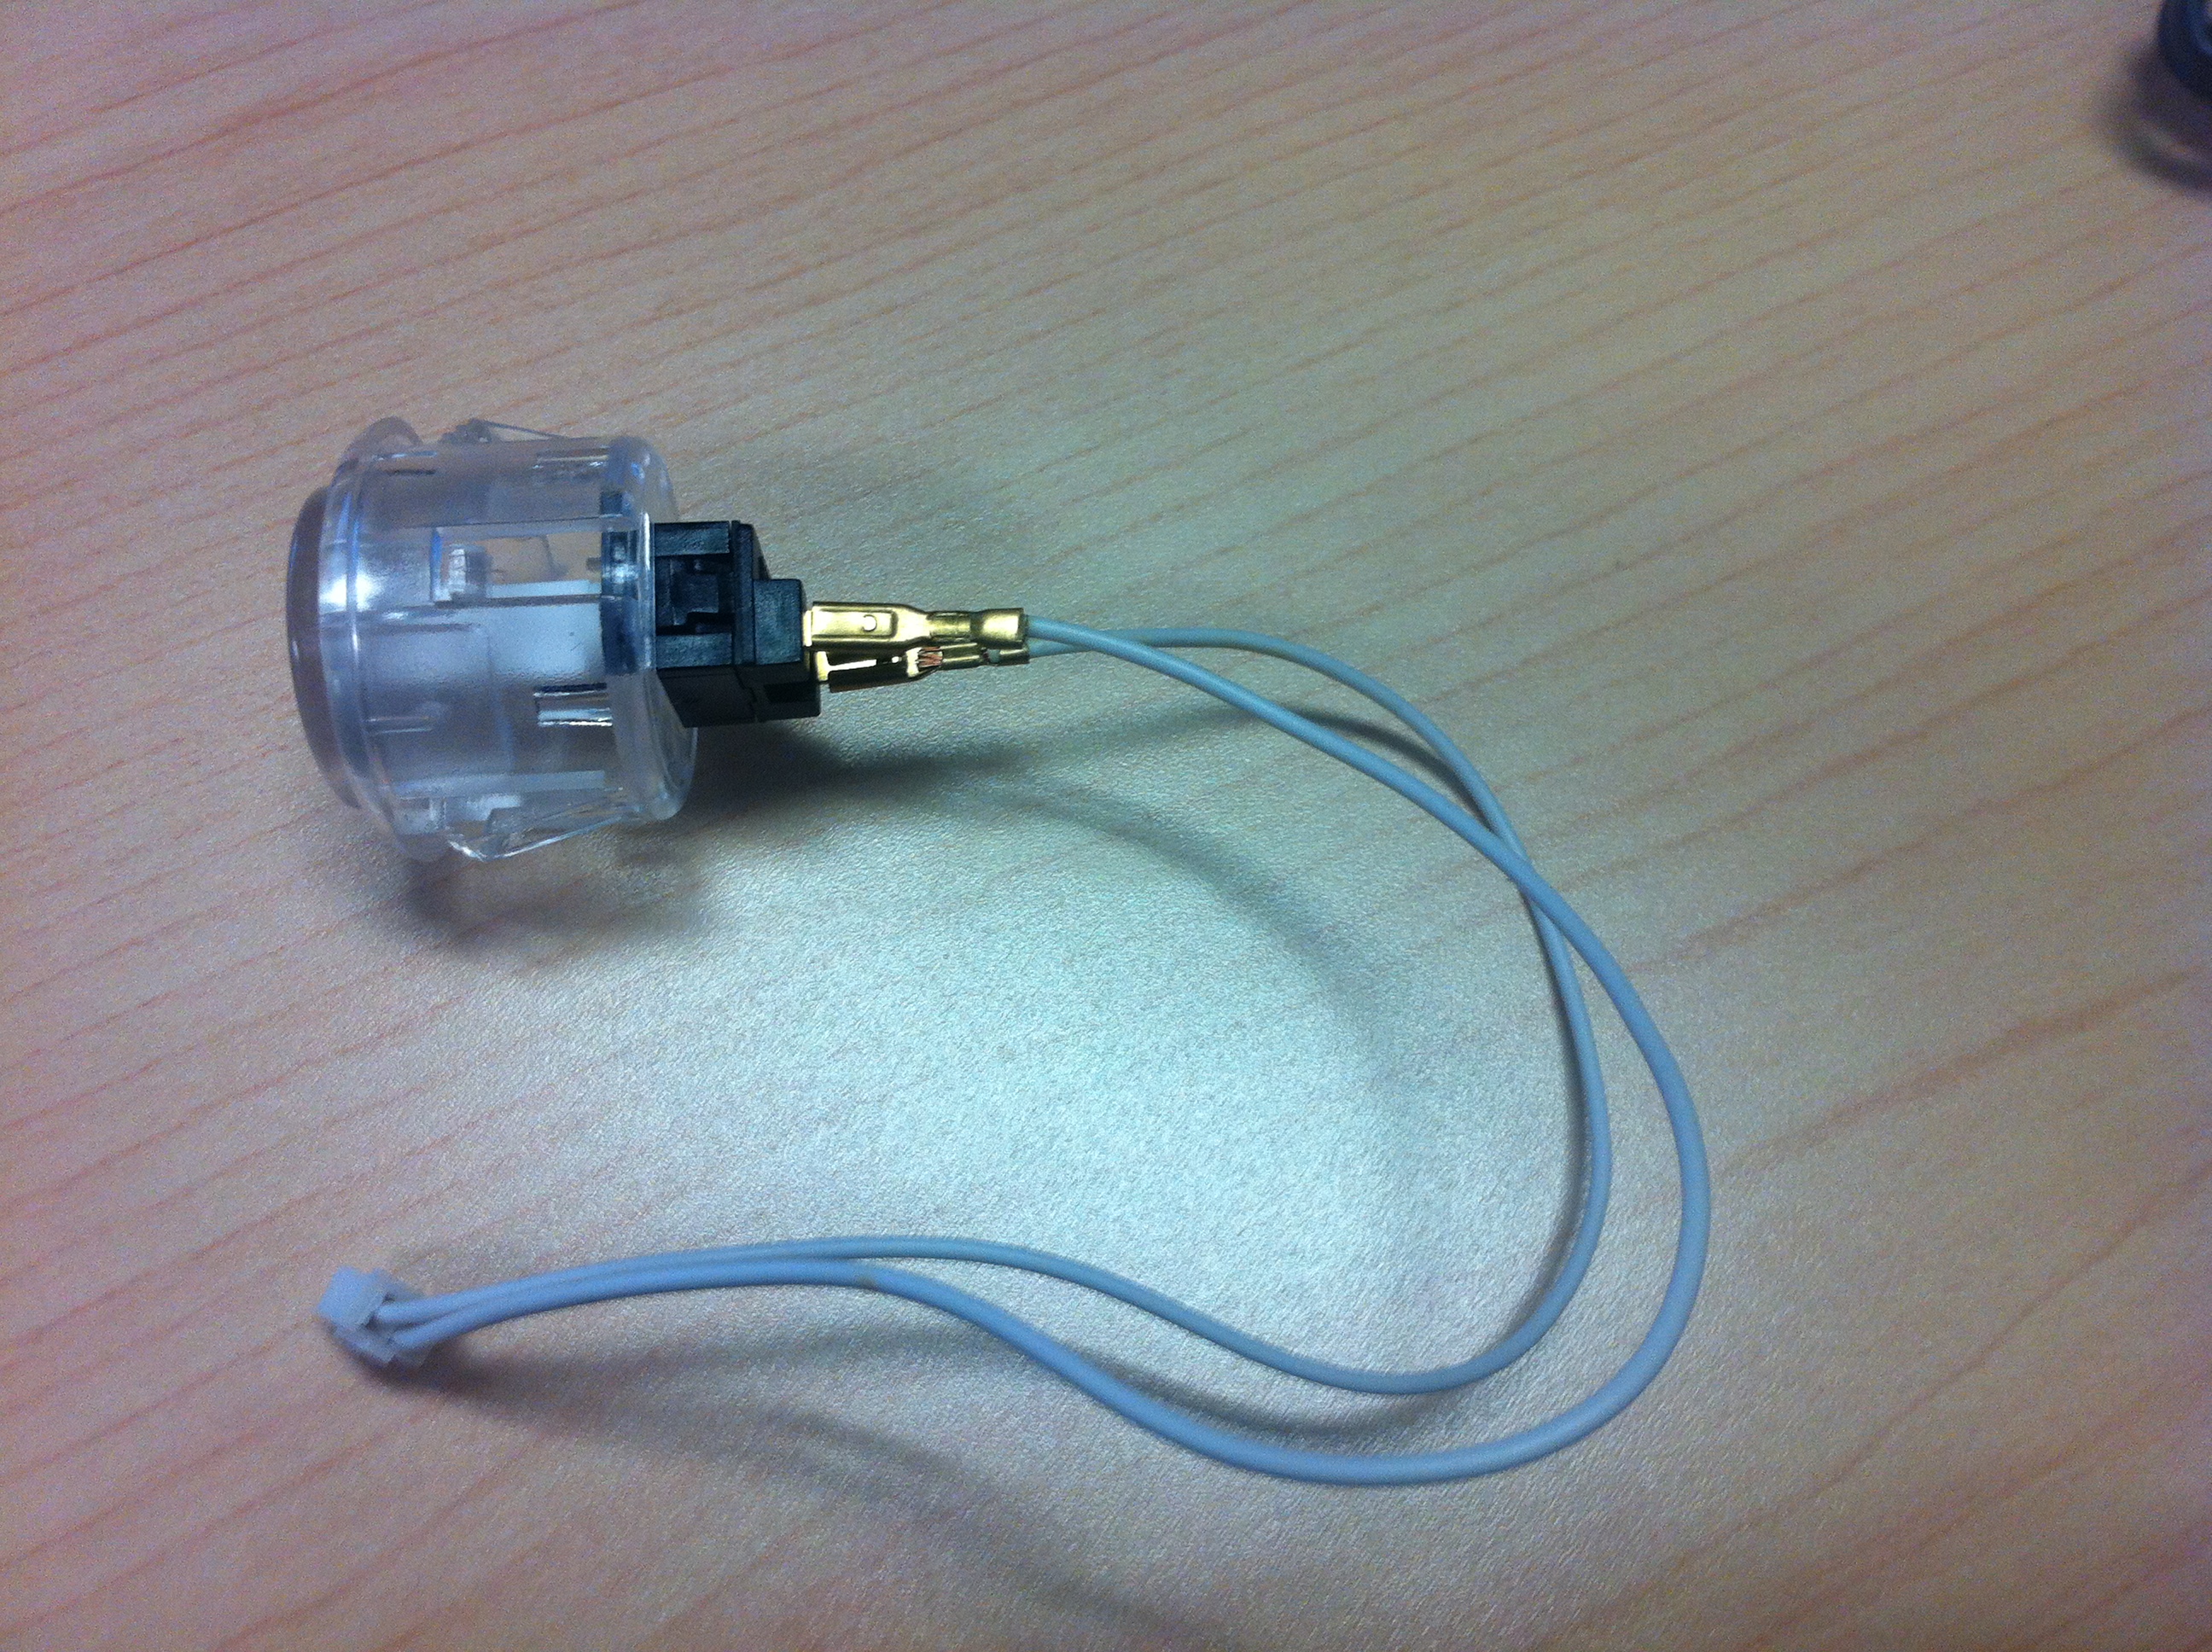
The button itself is a flat Japanese style arcade button in translucent red. It was originally used in my first Arcade project and acquired from Adafruit. The features of this particular style of button are it is dead simple for beginners which at the time I was exactly that. There are 2 small prongs on the button and the basic jist of getting this whole thing to work is that 1 pin goes to a live GPIO pin and the other goes to a ground pin.
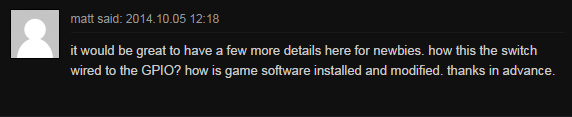
The cable
Now, Adafruit being as thorough as they are on their tutorials also provided a simple all in 1 cable with the appropriate female connecting prongs on one end and on the other end a double jumper so you can place it over a ground pin and GPIO pin in one step.
GPIO
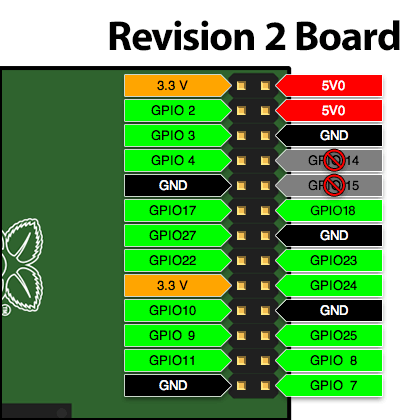
As I mentioned in another post shortly after my shut down button post if you connect a button to Pin 5, better known as GPIO 3 on the GPIO image a Pi in stand by mode will wake up/boot when pressed so if you want a dual function shutdown and power on button you should connect your button to GPIO 3. For the purposes of the equipment I use this also has the extreme convenience of being right across from a ground pin.
Retrogame
Once again hands off to Adafruit for creating this little gem I have since turned it into my Swiss army knife of GPIO button interaction. My version can be found here on my Github account. If you just want duplicate functionality then retrogame-xbmc.c is all you need it is already set up in that source file and you just need to compile it to a binary and go. However, details being what they are….
In the definition of io[] (line 89) in the C file I made sure the last entry in the table pointed to pin 3. Technically the table could be just that one line as I don’t actually use any of the other pins on this particular machine. The key it presses doesn’t matter but it is a good idea to make sure it isn’t a key that whatever application your Pi is running acts on.
{ 3, KEY_LEFTALT }
Line 131 I changed the mask to the same values, this allows it to work as 1 button instead of the 2 the original developer had set it up for.
const unsigned long vulcanMask = (1L << 5) | (1L << 5);
Line 394 I changed the #if condition to always exist, this was blocked off by the original developer as they moved away from this style of shut down method. I suppose I could just take the block out but I was just looking for functionality not cleanliness. I don’t believe this code even exists anymore in the main retrogame tree but with me it will live forever!
		} else if(timeout != -1) { // Vulcan timeout occurred
#if 1 // Old behavior did a shutdown
			(void)system("shutdown -h now");
However if you don’t care about any of that an easy way to get started is:
git clone https://github.com/CrazySpence/Adafruit-Retrogame.git
cd Adafruit-Retrogame
cp retrogame-xbmc.c retrogame.c
make
It’ll complain about gamera being missing or something but don’t worry about that retrogame will be compiled. If it complains about anything else make sure you have GCC, make and the uinput kernel module installed on your OS.
Run on boot
Make sure to add “/pathto/yourbinary/retrogame &” to /etc/rc.local file and then it will start on boot and stay in the background.
Hi!
I’m new in Raspberry Pi, and I have done everythink you write here.. But I don’t understand the last step, how to run on boot.. I have try to write that in /etc/rc.local, but when I reboot the raspberry and try to press the button, nothing happen, and I try to see what processes are runnig but there isn’t retrogame that is running..
And one more think, when I try to shutdown raspberry, and than press the button, the raspberry turn on..
Please, can you help me?
Thanks! 🙂
If you run the retrogame binary manually and then hold the button does it shut down? If it does then the problem is with your addition to rc.local it must be incorrect some how
it must be the full path so say it is in your home folder then the full path would be /home/pi/retrogame or if it was in /usr/bin then it would be /usr/bin/retrogame
For the turning back on part, If you put the button on the pin I said in the details then when the Pi was off it would in fact turn it on as this is just a function of that pin.
Sorry, now it’s working.. It’s all good..
I wasn’t hold the button down, I just press to short, and now when I hold more, it’s work perfect!
Thank you for help, great work! 🙂
No problem, glad I was able to help
I was confused by the /path/to/retrogame and once I figured that out, the system would hang, waiting for input. So I had to add an & to the rc.local line
For anyone else who installed it by default in their /home/pi/ folder and can’t get the button to respond:
sudo nano /etc/rc.local
go to an empty line below: # By default this script does nothing and add this line:
/home/pi/Adafruit-Retrogame/retrogame &
The & makes the system keep booting while waiting for a button press, a vital piece of information that is missing.
My bad, yes the & is necessary and I updated the post to include it
And thanks for the tutorial, you really explained the process in an easy to understand way. Much appreciated
Thanks for this more detailed write up. Nailed all my basic questions. I plan to use this to do both a power switch, and to add another button, as a dedicated “escape” key on another pin.
How do you turn the pi back on? Just un plug it and plug it back in again? Any ideas on adding a physical on/off switch?
As I explained in the post if you use Pin 5 (GPIO 3) all you need to do is hit that button again and the Pi will start back up when it is in standy/off mode
Thanks! This works like a charm.
That is just awesome! Thanks a lot for these instructions.
This was exactly what I was looking for to add a power on/off to my project. On thing I stumbled across trying to clean up the io array, though. If you do try to take out the unnecessary entries (I had to because of too many conflicts with my existing GPIOs), your vulcanMask will have to change. For example, if all you have is:
io[] = {
{ 3, KEY_LEFTALT }
};
Then your mask will be:
const unsigned long vulcanMask = (1L << 0) | (1L < /sys/class/gpio/export
echo ‘out’ > /sys/class/gpio/gpio14/direction
for step in 1 2 3 4 5
do
echo 0 > /sys/class/gpio/gpio14/value
sleep .2
echo 1 > /sys/class/gpio/gpio14/value
sleep .2
done
shutdown -h now
Yikes… my text got a bit mangled there… let’s try this again.
This was exactly what I was looking for to add a power on/off to my project. On thing I stumbled across trying to clean up the io array, though. If you do try to take out the unnecessary entries (I had to because of too many conflicts with my existing GPIOs), your vulcanMask will have to change. For example, if all you have is:
io[] = {
{ 3, KEY_LEFTALT }
};
Then your mask will be:
const unsigned long vulcanMask = (1L << 0) | (1L < /sys/class/gpio/export
echo ‘out’ > /sys/class/gpio/gpio14/direction
for step in 1 2 3 4 5
do
echo 0 > /sys/class/gpio/gpio14/value
sleep .2
echo 1 > /sys/class/gpio/gpio14/value
sleep .2
done
shutdown -h now
So how do you maintain a website where I share my findings and is sometimes know how much is gratifying to receive a review.
I have some of these buttons I used on a project to morse code handler, which already will use to turn off my Raspberry B +
Congratulations friend and thanks for sharing this valuable information with the community!
Greetings from Manaus, Amazonas, Brazil
Hi,
I’m so glad i found this page. I am building an small arcade using a Rpi B+ with 40 gpio pins. I made it through installing Mame4all_pi and have roms working.
I’ve used retrogame.c before but am having a hard time getting the Key_Esc to shut down my pi. I looked through your retrogame-xbmc and copied over the vulcan pinch and key mapping to the retrogame.c (since I am following the Adafruit retro gaming tutorial) The Key_esc does exit me out of Mame but still cant get it to shut down.
Am I missing something from retrogame-xbmc? I have it connected to gpio 3 and gnd… So close! thanks for any help you can provide.
you cant use the same key for two things it’ll always do the first choice in the code
you need a button for escape and a button for shut down